In many online discussions and podcasts, people keep writing off the 501st as a relic of an older version of the game. The usual take is that Legion has moved past the old brawler style — and that the units the battle force is built around are now simply too expensive for the current meta. On paper, I actually agree with part of that. ARC Troopers are definitely past their dominant heyday. But it isn't because of points.
It's because people don't really understand how the unit is supposed to be played anymore, or what list-building fundamentals you actually need to make ARCs — and the 501st as a whole — work in the current game.
The 501st Is Still a Gunline (Just Not the One You Remember)
The 501st honestly plays closer to what legacy Legion would have called a gunline than people realize. That sounds weird because the focus pieces are best at range 2 instead of 3 or 4, but the way the list applies pressure is still very similar.
To make ARCs work, you have to start by being honest about their two most significant weaknesses:
- They don't apply meaningful pressure on turns 1 and 2.
- They lose a ton of value if they have to overextend before the opponent is actually exposed for scoring in round 2.
That's where strike teams come in. Strike teams give you real long-range pressure on turn 1 and early turn 2, and they also flood your order bag with Special Forces tokens. That matters a lot — it lets you pull SF units early in round 2 without having to commit any of your ARC squads yet.
Strike teams do two huge things for GAR: they help fix one of GAR's most significant problems — starting behind on activations — and if you get a kill early, you're technically winning if nothing else changes. That alone lets you play way more conservatively.
As long as you control your home POIs, your opponent must move forward. And that is precisely what ARCs want. Your ARCs can sit safely while enemy units have to walk into their kill zone — basically range 3 from the ARC unit. Once you add clone commandos on top, the attrition becomes very real. Between two or three strike teams and two commando shots, it's very realistic to remove one to two activations a turn.
You Could Do This in Generic GAR… But 501st Does It Better
Technically, you could build this same idea in a standard GAR list — you could even run three commandos. Where the 501st really shines is the fact that you only need one corps unit.
With HQ Uplinks on your commandos, your order bag is basically all Special Forces. That gives you almost near perfect order control. ARCs absolutely need that. If you can't control when your ARCs activate, their impact on the game drops off hard.
You Still Need Real Board Presence — That's Anakin's Job
I love the old gunline style of slowly picking apart the enemy and forcing them to walk into you. Still, Legion 2.6 is a much more active scoring game. You still have to contest POIs in the middle of the table.
Anakin has a unique ability to be staged safely with Prepared Positions while still threatening the center POIs. If you use good LOS blockers in the midboard and set him up correctly on turn 1, he can realistically contest almost any POI. That lets you stay roughly neutral on scoring in round 2 while the rest of your list focuses on attrition with your range 4 and 5 units.
Tempted works exceptionally well with strike teams. Play your strikes aggressively as scoring pieces in the late game — if they die this typically means triggering Tempted, which replaces the lost value.
How I Usually Split the List on the Table
Like most lists, I mentally break the army into two groups.
This setup really maximises Tempted. If your opponent kills strike teams near Anakin, you usually trigger Tempted — a significant deterrent. If they don't kill them, you get pressure and scoring. Either way, it's usually a win. Commandos flex depending on the table, but I almost always like having one commando unit on the non-Anakin side to address standby control.
Surge Access Is Absolutely Mandatory
One of the most important fundamentals for 501st — and GAR in general — is surge access. From both testing and actual games, I've feel you need at least three surge sources on the board at the start of the round, ideally on your ARCs.
When players started swapping clone commanders for medics, that's honestly when GAR began to lose its identity — universal access to surging red saves. As a quick comparison: four ARC squads with medics sit at 48 effective wounds, while four ARC squads with commanders jump to 60.
The Baseline List — And Why It Has a Problem
The first version I really put serious time into was built around maximising activations and flooding the order bag with three strike teams. Here's what that looked like:
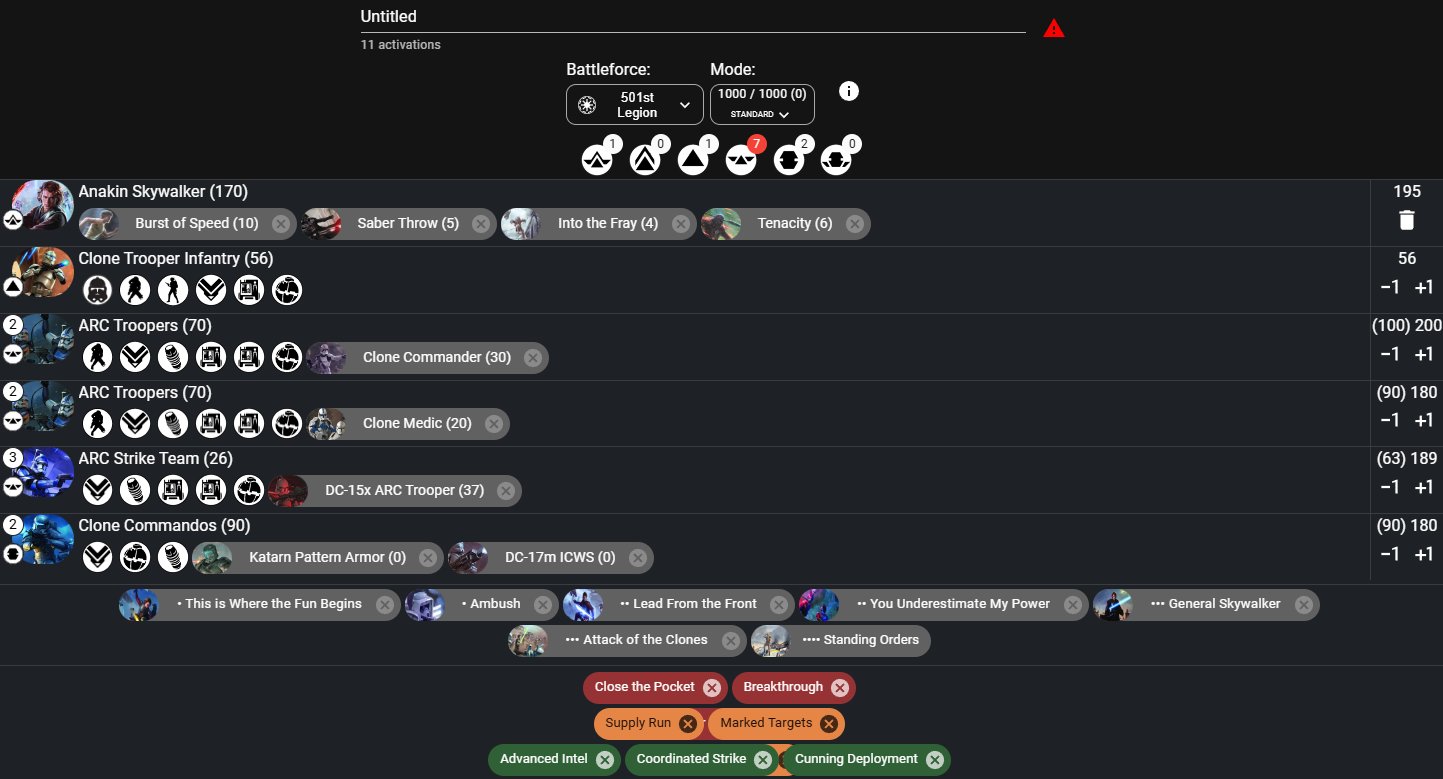
It's an excellent list that does a lot of things well. Eleven activations gives you real flexibility on priority, three strike teams flood the bag early, and the surge sharing keeps ARCs healthy through the early rounds.
Its biggest problem is Standing Orders and order control. You can't reliably play Standing Orders and still consistently pull commando tokens out of the bag with HQ Uplinks — the math just doesn't work cleanly with three strike teams pulling SF tokens alongside them.
Standing Orders is a big boon for GAR. Turn 1 with 501st needs you to have full control of commandos to apply maximum pressure. With three strike teams in the bag alongside your commandos, you can't fully commit to both at the same time. Something has to give, and a wrong token pull with all of these timing sensetive units could cost you games.
Standing Orders are significant right now. A lot of lists are sitting at 12–13 activations, and lossing priority on turn 1 then getting double-lasted on deployment can be brutal. At the same time, your commandos are your biggest zoning tools. If you lose control of when they activate, your opponent has much more freedom to play aggressively into you.
Why Ahsoka Actually Fixes a Lot of Problems
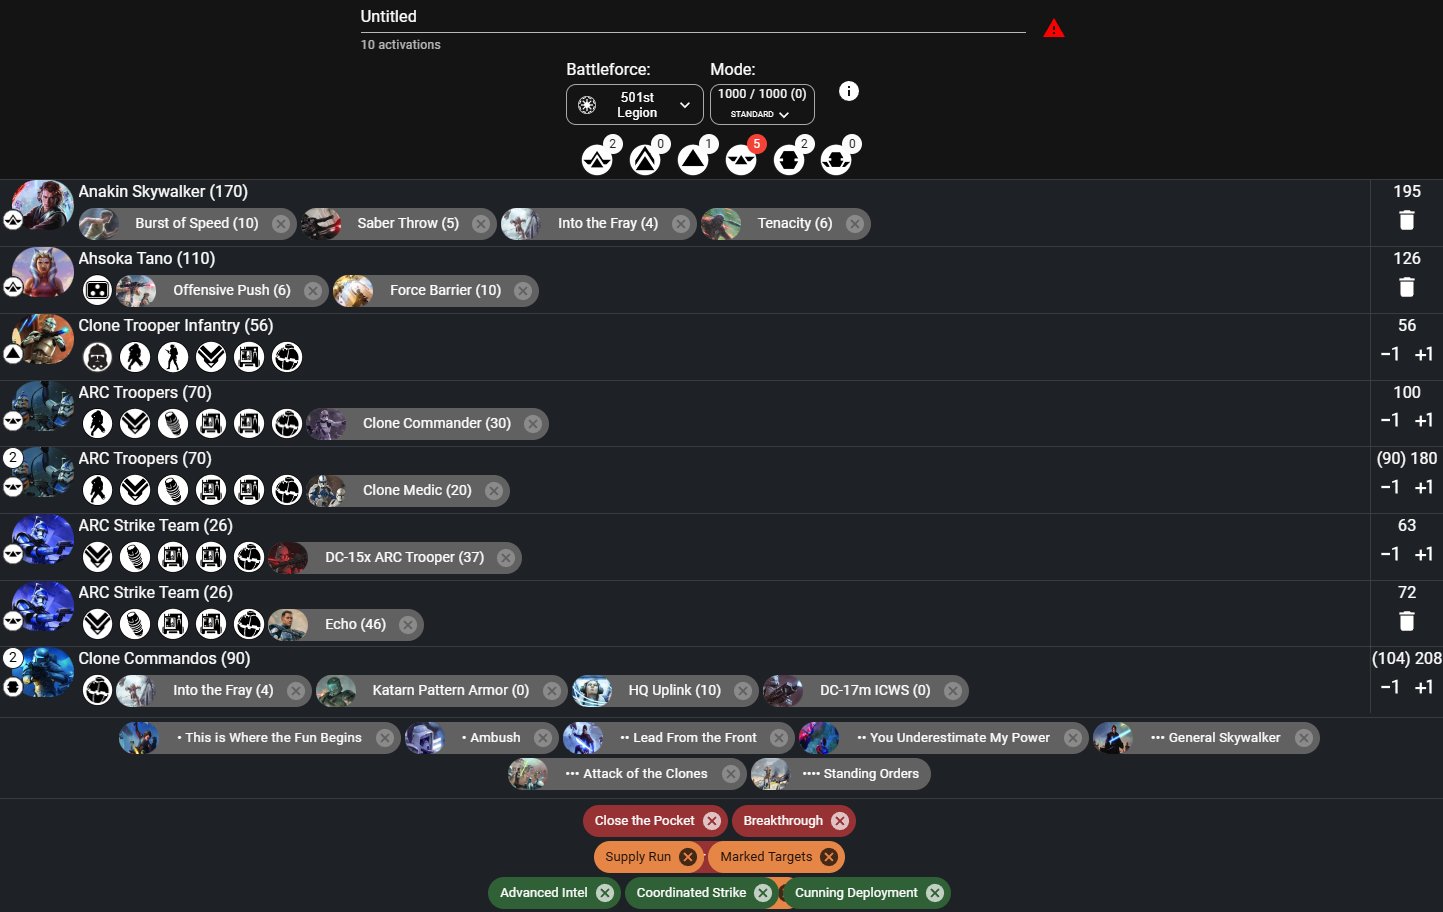
After a lot of iterations — testing different commander counts, swapping more strike teams for commandos, adjusting the corps slot — I landed on a refined version that drops one activation but gains a massive amount of defensive technology and order consistency. The key change is swapping an ARC for Commander Ahsoka Tano and dropping a Commander for a Medic upgrade on a ARC to get the points for a Echo Strike Team.
You lose one activation compared to the baseline, but the gains are significant. Echo's damage profile — Critical 1 and double red — makes up for the lost strike team's offensive output. More importantly, he gives you that much-needed third surge source at the top of the round, so your defensive sharing stays online consistently.
Her Force Barrier and Guardian on her three-pip basically give your Medic ARCs pseudo-surge to defend as they move in, keeping them healthy through the approach phase. Into the current meta boogeyman — Evan's Grievous wheel bike list — the math is very consistent. After double Force Barrier, Guardian, dodge stacking, and two medic charges, you usually only take about two wounds, almost always on Ahsoka herself. You keep basically all of your offensive output.
Ahsoka's four-pip is also extremely good into the Grievous dive. It almost always strips all of his dodge tokens, which sets him up for a terrible time once the ARCs and impact commandos start shooting him. In most of my practice games, I was killing a aqua and/or two STAPs and Grievous early in round 2, while only losing a few clone models.
Objectives Are What Actually Make This List Work
None of this really matters if you don't pick the right objectives. This list wants objectives that force people to walk into you.
The Real Downside — And Why 501st Fell Off Competitively
The biggest weakness of the 501st is that the moment you start overextending to punish a mistake too hard, the list can fall apart very quickly. Like most GAR lists, every unit actually matters. Losing a single piece early — especially an ARC unit or a commando — can start a snowball that's extremely hard to stop.
This list is built to win through controlled attrition, not big swing turns. If you overextend to pick up a kill and it leaves your ARCs or support pieces exposed to multiple return shots in the same round, you usually just traded away your advantage.
If a target is dangled in front of you but taking it opens you up to two or three real volleys in return, it's almost always the wrong play. Unless you can be confident the trade won't let your opponent punish you immediately, let it go and force them to keep walking into your threat range.
The old versions of 501st had well over 100 extra points to work with. That extra padding let you play much looser. That safety net is gone now. The list is much more balanced, but much less forgiving. The floor has been lowered because you no longer have those extra points propping up bad positioning or greedy plays. The ceiling, though, is still there.
The 501st isn't dead. Its playstyle was just misunderstood. ARCs were never meant to be early pressure units. They're intended to dominate the midgame after your long-range pieces and order control force your opponent to play into your threat envelope. If you build the list with a strong understanding of these principles, the 501st is still a very real threat in the current meta.